Build a table-view paddle game scene
A classic arcade paddle game is a flat vertical screen — both paddles the same distance from the camera, separated left/right. This tutorial builds the other kind: a physical table you stand at one end of, your own paddle close in the foreground and the opponent's paddle small in the distance — then swaps the generic arcade backdrop for a sunset desert without touching the table itself. The whole thing is one Group per section, assembled with plain .add() calls and added in a single undo step. Open the editor, open the Shell tab, and paste each block in order.
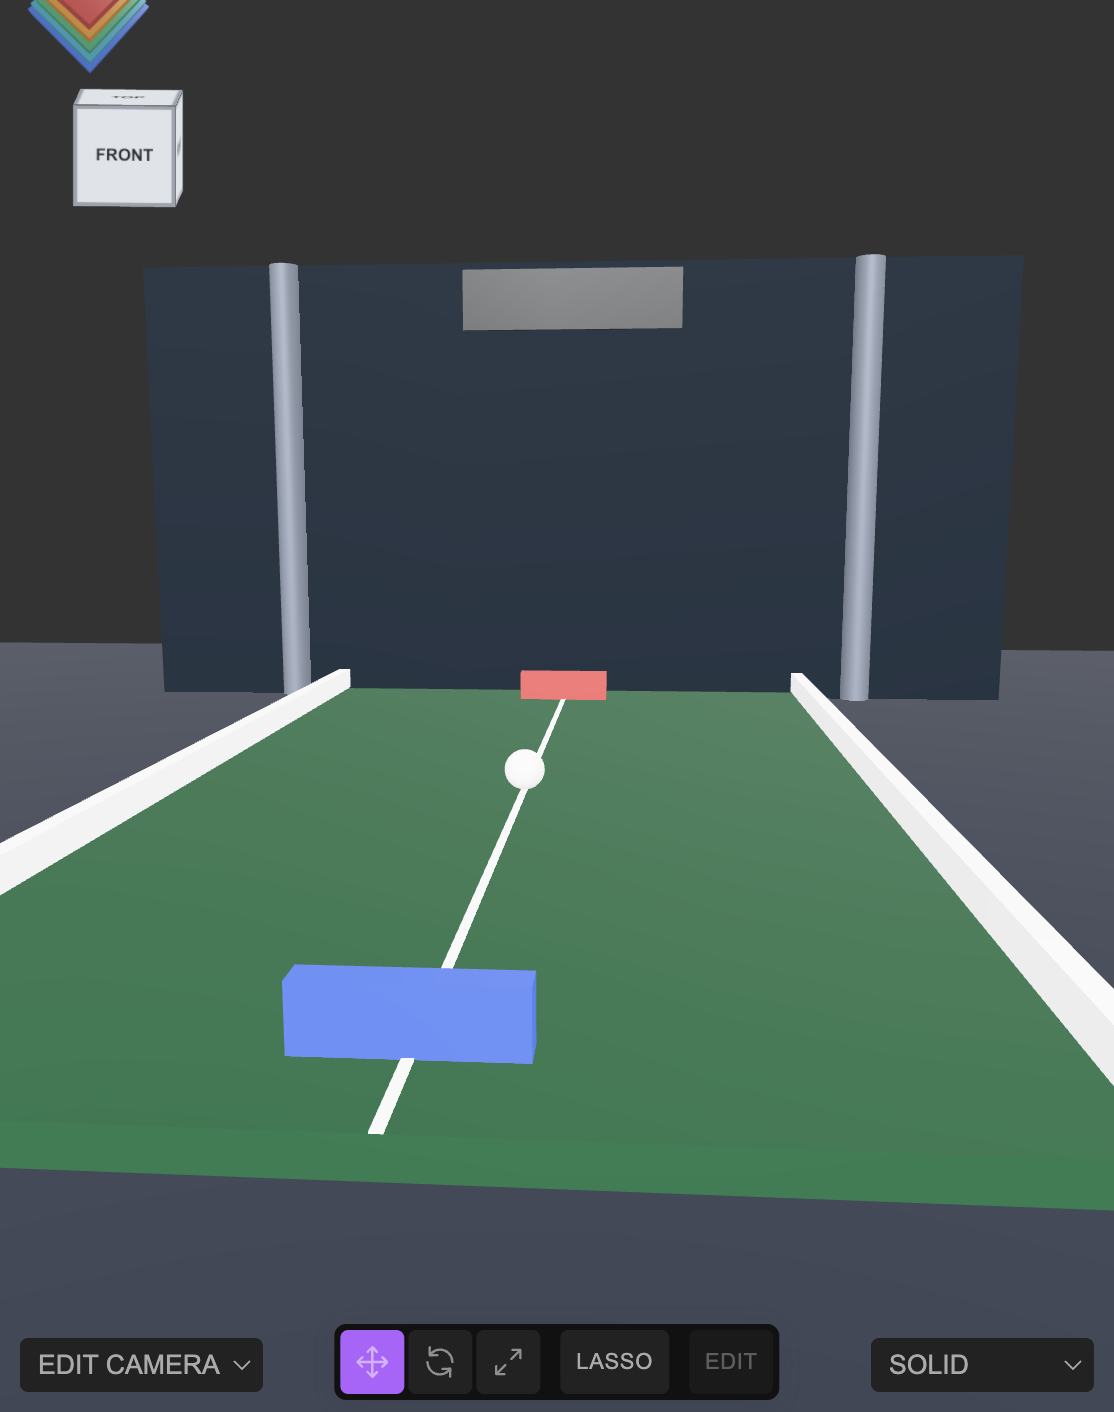
+x/-x, walls on +y/-y, camera parked on +z looking straight in — and then trying to fix the camera afterward to make one paddle look "far away." No camera angle can do that: both paddles are equidistant from the camera on that layout, so any attempt to view it obliquely just makes the thin flat parts (walls, table) foreshorten into confusing diagonal slabs. Decide up front which world axis is "the length of the table" and build paddles onto that axis (here, z) — the perspective camera then does the near/far size difference for free.1 Lay out the table along z, not x
Keep y as true vertical (matches the camera's default up vector) and put the two paddles at opposite ends of z instead of x. Build every part into one Group with .add(), then add the whole group with a single AddObjectCommand:
const group = new Group();
group.name = 'Paddle Game';

const tableMat = new MeshStandardMaterial({ color: 0x1c5c3a, roughness: 0.7 });
const railMat = new MeshStandardMaterial({ color: 0xffffff, roughness: 0.5 });
const playerMat = new MeshStandardMaterial({ color: 0x2e7dff, roughness: 0.4 });
const compMat = new MeshStandardMaterial({ color: 0xff4444, roughness: 0.4 });
const ballMat = new MeshStandardMaterial({ color: 0xffffff, roughness: 0.3 });

const table = new Mesh(new BoxGeometry(12, 0.4, 24), tableMat);
table.name = 'Table'; table.position.set(0, -0.2, 0);
group.add(table);

const railL = new Mesh(new BoxGeometry(0.3, 0.5, 24.4), railMat);
railL.name = 'Rail Left'; railL.position.set(-6.15, 0.25, 0);
group.add(railL);

const railR = new Mesh(new BoxGeometry(0.3, 0.5, 24.4), railMat);
railR.name = 'Rail Right'; railR.position.set(6.15, 0.25, 0);
group.add(railR);

const centerLine = new Mesh(new BoxGeometry(0.12, 0.02, 24), railMat);
centerLine.name = 'Center Line'; centerLine.position.set(0, 0.01, 0);
group.add(centerLine);

// The two paddles are on opposite ends of z — this is the whole trick.
const playerPaddle = new Mesh(new BoxGeometry(2.2, 0.7, 0.4), playerMat);
playerPaddle.name = 'Player Paddle'; playerPaddle.position.set(0, 0.35, 10.5);
group.add(playerPaddle);

const compPaddle = new Mesh(new BoxGeometry(2.2, 0.7, 0.4), compMat);
compPaddle.name = 'Computer Paddle'; compPaddle.position.set(0, 0.35, -10.5);
group.add(compPaddle);

const ball = new Mesh(new SphereGeometry(0.35, 24, 24), ballMat);
ball.name = 'Ball'; ball.position.set(0, 0.35, 0);
group.add(ball);

editor.execute(new AddObjectCommand(editor, group));
2 Frame the far end
A backdrop, two pillars, and a scoreboard panel behind the computer's end give the camera something to look at beyond the far paddle — an empty background makes distance harder to read. Same pattern: one group, plain .add(), one command:
const scenery = new Group();
scenery.name = 'Background Scenery';

const floor = new Mesh(new PlaneGeometry(60, 50), new MeshStandardMaterial({ color: 0x333844, roughness: 0.9 }));
floor.name = 'Floor'; floor.rotation.x = -Math.PI / 2; floor.position.set(0, -0.45, -2);
scenery.add(floor);

const backdrop = new Mesh(new PlaneGeometry(24, 12), new MeshStandardMaterial({ color: 0x14202c, roughness: 0.85 }));
backdrop.name = 'Backdrop'; backdrop.position.set(0, 5.5, -14);
scenery.add(backdrop);

const pillarMat = new MeshStandardMaterial({ color: 0x777f8c, roughness: 0.6 });
const pillarL = new Mesh(new CylinderGeometry(0.4, 0.4, 12, 16), pillarMat);
pillarL.name = 'Pillar Left'; pillarL.position.set(-8, 5.5, -14);
scenery.add(pillarL);

const pillarR = new Mesh(new CylinderGeometry(0.4, 0.4, 12, 16), pillarMat);
pillarR.name = 'Pillar Right'; pillarR.position.set(8, 5.5, -14);
scenery.add(pillarR);

const board = new Mesh(new BoxGeometry(6, 1.6, 0.3), new MeshStandardMaterial({ color: 0x101418, roughness: 0.5 }));
board.name = 'Scoreboard'; board.position.set(0, 10.5, -14);
scenery.add(board);

editor.execute(new AddObjectCommand(editor, scenery));

editor.execute(new AddObjectCommand(editor, new AmbientLight(0xffffff, 0.5)));
const dir = new DirectionalLight(0xffffff, 1.2);
dir.position.set(4, 12, 10);
editor.execute(new AddObjectCommand(editor, dir));
3 Stand the camera behind your own paddle
Position it a little further back than the player paddle's z, raised in y for eye height, and lookAt a point near the far end — down and slightly beyond the computer paddle, not the paddle itself, so the whole length of the table stays in frame:
const cam = editor.camera;
cam.position.set(0, 3, 21);
cam.up.set(0, 1, 0);
cam.fov = 60;
cam.lookAt(0, 0.2, -8);
cam.updateProjectionMatrix();
editor.controls.center.set(0, 0.2, -8);
editor.signals.cameraChanged.dispatch(cam);
editor.signals.objectChanged.dispatch(cam);z offset that seems modest can put the camera nearly edge-on to a thin flat object (a wall, a table surface), foreshortening it into a huge confusing diagonal slab that looks like a bug but isn't. Before trusting a screenshot, project the key points you care about through the candidate camera and check their normalized device coordinates (both components should stay roughly within -1..1 to be on screen):
const p = new Vector3(0, 0.35, 10.5).project(editor.camera); // Player Paddle
console.log(p.x, p.y); // outside -1..1 means it's off-frame
Comparing camera.position.distanceTo(...) to the near and far paddle also confirms the perspective ratio you're actually getting (here, roughly 2× — the far paddle is about twice as distant as the near one) before you spend time re-screenshotting.
4 Swap the arcade backdrop for a desert
The table itself never has to change — only what surrounds it. Remove the old Background Scenery group (and any stray lights left over from earlier experiments) with RemoveObjectCommand, the exact undo-tracked inverse of the AddObjectCommand that created them, then build a new Desert Scenery group the same way as step 2: a dune-displaced sand ground, a gradient sky plane, distant mesas, and a scatter of rocks and cacti kept clear of the rails:
const oldScenery = editor.scene.getObjectByProperty('name', 'Background Scenery');
if (oldScenery) editor.execute(new RemoveObjectCommand(editor, oldScenery));

const desert = new Group();
desert.name = 'Desert Scenery';

// Dune-displaced sand, reusing the noise-ground technique from "Build a night
// scene from scratch" — the further a vertex is from the table, the more relief.
const sandMat = new MeshStandardMaterial({ color: 0xd9b579, roughness: 0.95 });
const groundGeo = new PlaneGeometry(90, 90, 48, 48);
const gp = groundGeo.attributes.position;
for (let i = 0; i < gp.count; i++) {
  const x = gp.getX(i), y = gp.getY(i);
  const d = Math.sqrt(x * x + y * y);
  gp.setZ(i, Math.sin(x * 0.08 + 1.7) * Math.cos(y * 0.09) * 1.1 + Math.max(0, (d - 14)) * 0.02);
}
groundGeo.computeVertexNormals();
const ground = new Mesh(groundGeo, sandMat);
ground.name = 'Sand Ground';
ground.rotation.x = -Math.PI / 2;
ground.position.set(0, -0.46, -5);
desert.add(ground);

// A warm gradient painted onto a 4x256 canvas, stretched across a huge far plane —
// cheaper than a sky dome and plenty convincing behind mesas at this distance.
const skyCanvas = document.createElement('canvas');
skyCanvas.width = 4; skyCanvas.height = 256;
const sctx = skyCanvas.getContext('2d');
const grad = sctx.createLinearGradient(0, 0, 0, 256);
grad.addColorStop(0, '#3a3d6b');
grad.addColorStop(0.45, '#c9704f');
grad.addColorStop(0.75, '#f2a45c');
grad.addColorStop(1, '#fbd98b');
sctx.fillStyle = grad;
sctx.fillRect(0, 0, 4, 256);
const sky = new Mesh(new PlaneGeometry(140, 70), new MeshBasicMaterial({ map: new THREE.CanvasTexture(skyCanvas), fog: false }));
sky.name = 'Sky'; sky.position.set(0, 24, -55);
desert.add(sky);

const mesaMat = new MeshStandardMaterial({ color: 0x8a4b34, roughness: 0.9 });
[[-30, 5, -40, 10, 10, 8], [-14, 7, -46, 8, 14, 7], [20, 6, -42, 12, 12, 9], [32, 4.5, -38, 7, 9, 6]]
  .forEach((s, i) => {
    const mesa = new Mesh(new BoxGeometry(s[3], s[4], s[5]), mesaMat);
    mesa.name = 'Mesa ' + (i + 1);
    mesa.position.set(s[0], s[1], s[2]);
    mesa.rotation.y = i * 0.37;
    desert.add(mesa);
  });

editor.execute(new AddObjectCommand(editor, desert));

// Warm sun replaces the neutral arcade lighting.
editor.execute(new AddObjectCommand(editor, new AmbientLight(0xffd9a8, 0.55)));
const sunLight = new DirectionalLight(0xffdca8, 1.4);
sunLight.name = 'Sun Light'; sunLight.position.set(-18, 30, 10);
editor.execute(new AddObjectCommand(editor, sunLight));

setFog('FogExp2', '#e2a565', 0, 0, 0.012);
setBackground('#f2a45c');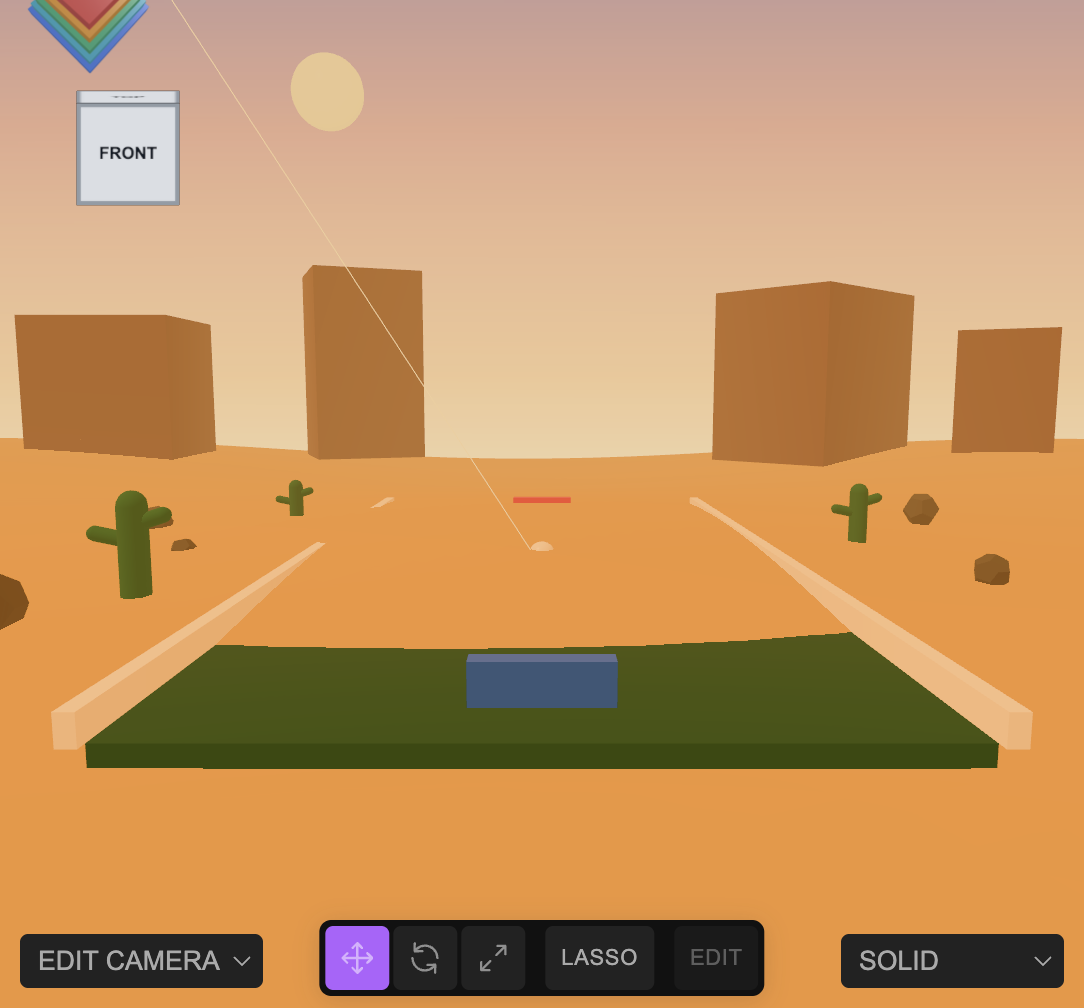
Background Scenery was swapped for Desert Scenery.|x| > 6.15 — the rails' own x position — so nothing overlaps the play area or blocks the sightline down the table. Placing scatter props is otherwise the same pattern as step 1/2: a small array of [x, y, z, ...params] tuples and a .forEach that builds one mesh per entry, named with an index so each stays individually addressable (findObject('Rock 3'), $S('#Mesa 1')).5 Sanity-check the object count
Every editor.execute(...) above is undoable and shows up in editor.history.undos. After any batch of Shell edits, especially ones driven by automation rather than typing, compare the scene's object count against what you expect:
editor.scene.children.length; // top-level count
editor.history.undos.length; // commands issued this sessionRemoveObjectCommand sitting in the same undo stack as your real edits. Checking editor.history.undos for command types you didn't intend to run is the fastest way to catch it, and every entry there is individually undoable if something needs reverting.Credits and licences
People
- Tejaswi Gowda (script)
Assets
None used.
Tools
None used.